|
|
Creating Panoramas with PTGui and Panotools
Introduction -
Loading the images and automatic control point
generation -
Panorama settings and projection types -
Revising control points and levelling the horizon -
Stitching and blending Revising control
points and levelling the horizon:
Control points are needed to tell the software the location of the same image
feature in two different images.
| The more control points you set, the more accurate PTGui will be
able to align the images. Nevertheless - as mentioned before, you should
choose a reasonable number of control points per image pair. Not too
few to be able to calculate all parameters correctly but also not too
many as you should still be able to check and revise the control points.
The minimum number of control points can be determined by counting the
parameters you want to optimize. A rule of thumb says that you should
use one control point pair for each parameter. e.g. if you already have
correct lens parameters and only want to optimize the Yaw, pitch and
roll of the images, you have to set 3 control points per image pair.
The relative position of CPs to each other can be compared to a
"lever force": the further away they are from the rest of the CPs, the
more impact they will have on the optimization. So - best practice is,
to distribute CPs evenly over your overlapping image areas. |
Choose the "Project Assistant" tab and click on the "Control point
assistant..." button. This will introduce a new window - the "Control points"
window:
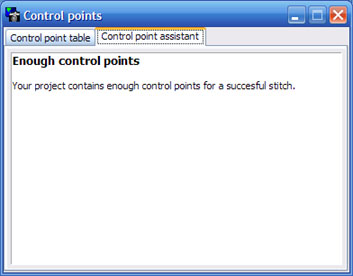
As you can see, we happily have enough control points for each image pair.
If there are missing control points for an overlapping image, the window
will tell you the ones with a hyperlink that will open the respective images
in the "Control Points" Tab:
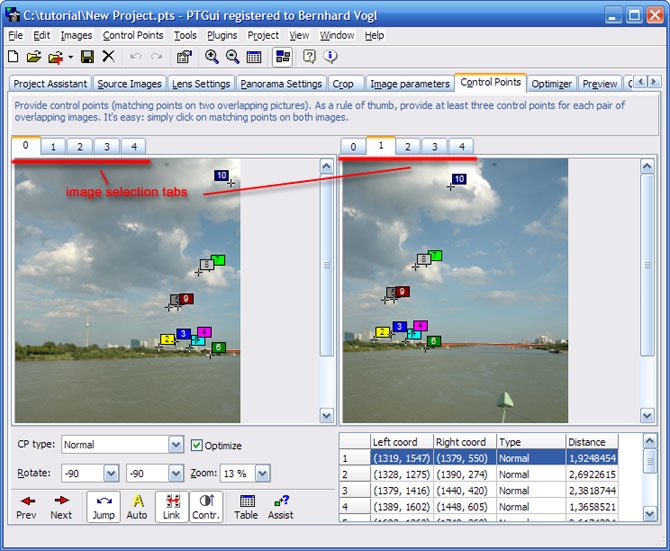
Here you can check, set, delete and move your control points in an intuitive
manner.
- First of all, make sure that you have selected 2 different but
overlapping images in the left and right area. You can see tabs in the
upper area of the window that represent your source images by numbers.
- To create a valid pair of control points: Left click with your mouse
in one window to set the first control point of an image pair. Left click
on the exact same image feature in the other window. You can fine-tune
the points by clicking on the "flag" of the control point and move the CP.
As soon as you release the mouse button, the new position is fixed.
- To delete a pair of control points: Right click on the flag of the
control point and select "Delete".
Levelling the panorama with the help of horizontal and vertical
control points:
There is a special mode hidden in this Tab which we will use to straighten/level our panorama:
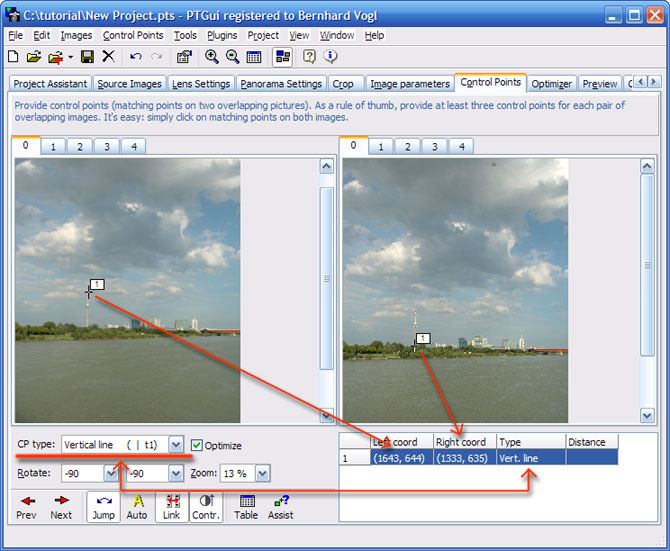
Choosing the same source image in the left and right window will switch
the Type of the control point to "vertical". Now you won't define the
exact same image feature any more but you will tell PTGui where vertical
lines can be found. In the following example, we are using the TV tower to
define a vertical line:
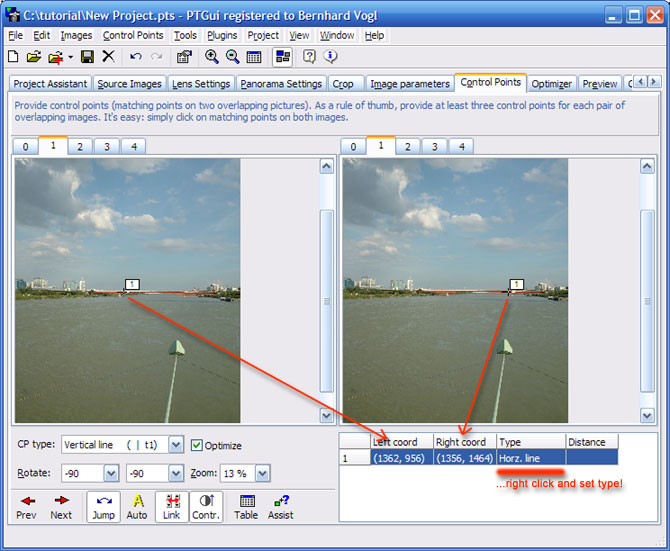
You should do this for as many source images in your panorama as possible.
You can also define horizontal control points but
only for horizontal
lines near the horizon or the horizon itself. For mathematical
reasons, horizontal control points that are far away from your horizon
will falsify the optimization:
What will also falsify our optimizations, are incorrectly set control
points. We will now optimize the panorama to calculate control point
distances. These distances will give us a clue which control points may be
set (or automatically determined) incorrectly.
| Repeating architectural features are a classical cause of
incorrectly set control points, e.g. a repeating ornament. Typically, such
features will occur at relatively large distances to each other,
resulting in
a big "lever force" (see above) in the optimizer. They are the most
likely reason for a completely screwed up image alignment in your
panorama. |
Change to the "Optimizer tab". First of all we have to configure the
optimization to our needs.
- If you don't use vertical/horizontal control points you may want to
leave the settings as they are (simple) and just optimize.
- Using vertical/horizontal CPs we have to give the optimizer a chance
to move all images freely for finding the correct horizon.
In this case, switch to "advanced" and ensure that "pitch" and "roll" of
all images are selected. You may want to leave "yaw" of one image
unchecked to ensure that your panorama won't try to 'escape' from the
"Panorama Editor" window...
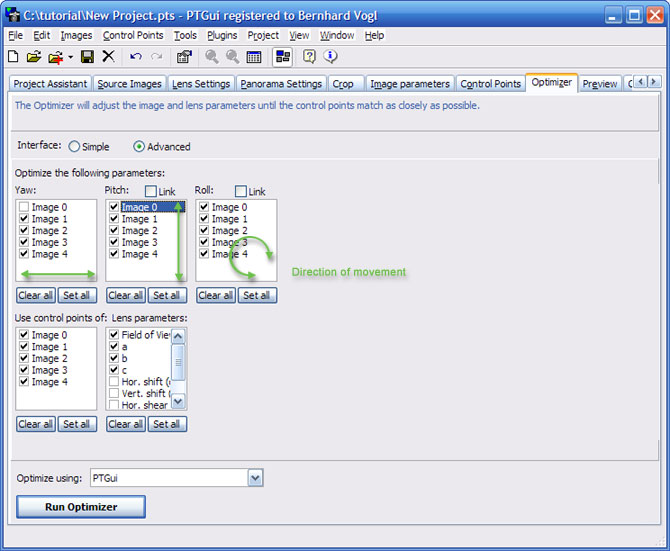
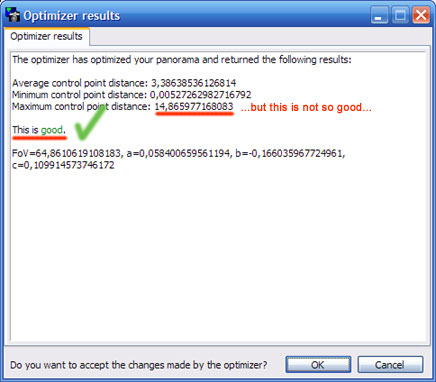
Now you can click on the "Run Optimizer" button. After a short
calculation time you will see a popup telling you the results of your
optimization. They should be at least 'Good' to have a usable panorama:
We will now switch to the additional "Control points" window which should
still be open. You will see 2 tabs in the upper area of this window - the
"Control point assistant" tab which we used before and the "Control point
table" tab which we will now activate. Also, ensure that the control points
are sorted by distance by clicking on the column heading:
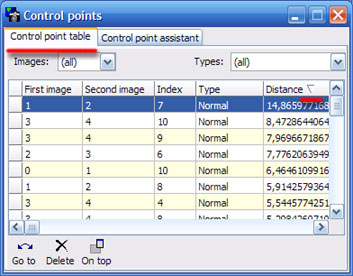
As you can see, there is a suspicious control point pair with a much bigger
distance than the other ones. To check the location of this pair, double
click on the corresponding line and PTGui will bring you back to the
"Control Points" tab in the main window with the questionable CP pair
blinking in the images:
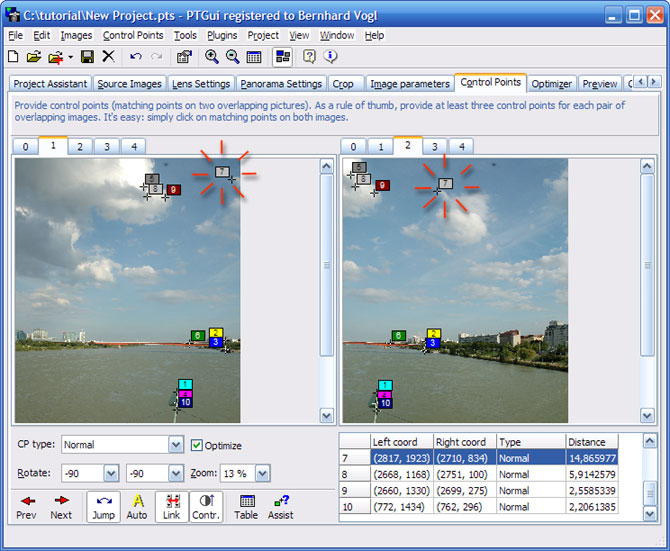
In this example, the moving clouds are the problem. There is no other
solution than to forego this control point.
You may set another CP in exchange for the deleted one (on a non-moving
image feature).
Now you can re-optimize your panorama - and repeat the above step until
you are content with the results....
(Use the "preview"-tab to get a first impression of your final
high-resolution stitch)
Next step: Stitching and blending |