Go here if you look for
an updated tutorial for PTGui V5 and above!
Part 3: Fine-tuning with
PTGui
Autopano has now created some control points for you. We now
have to check if the control points are correctly set.
Before we begin, we will define an anchor image. I hope you are a little
familiar with setting a correct horizon. If not, you may read the German
article "Entzerrung und die unverstandene
Horizontlinie" (sorry - no English - anyone who wants to translate it?)
Defining an anchor image
Luckily, our example is a panorama inside a church - We have
enough vertical lines for our needs. We will use two columns to tell PTGui
that they are perpendicular:
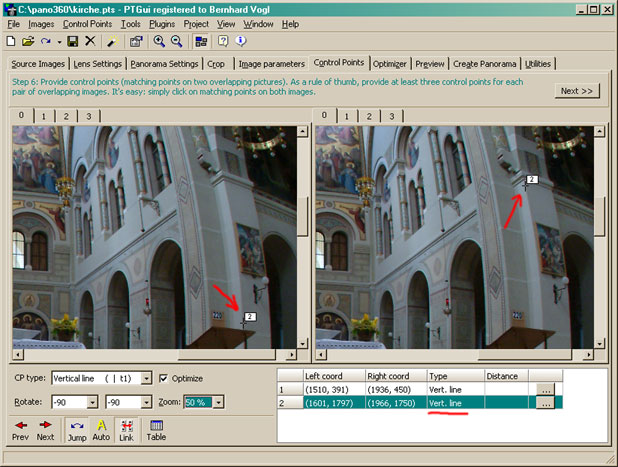
Click on the tab "Control Points" and let both control point windows
show the image number 0. This will also tell PTGui that you want to define
vertical lines!
Here is a screenshot of PTGui how it may look after defining a vertical
line:
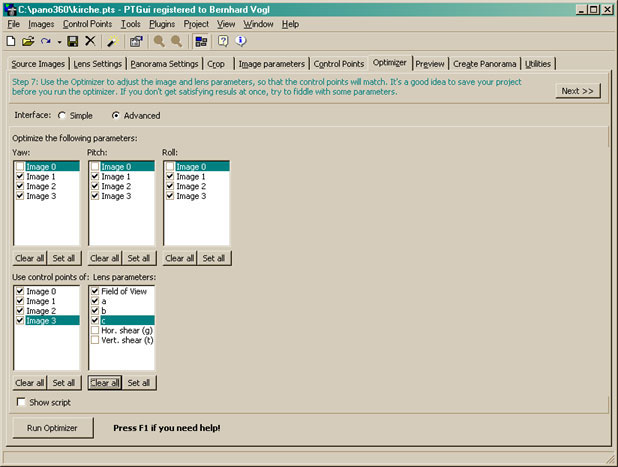
Change to the "Optimizer"-tab
Click on "Advanced" and unset all checkmarks except "Pitch" and "Roll" for image 0, also "Use control points of Image 0".
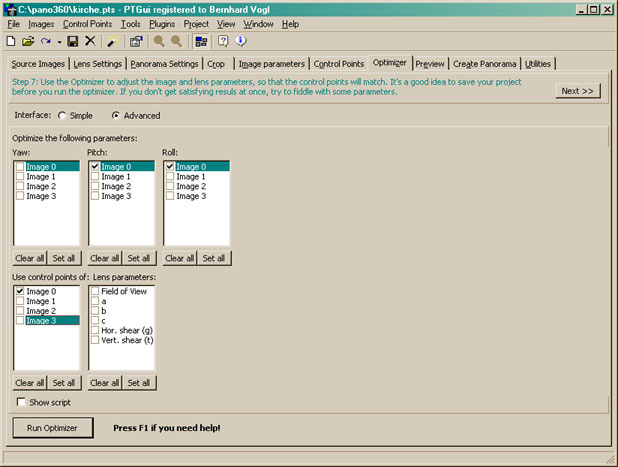
Click the button "Run Optimizer".
After a short time you will see a message box telling you the optimization
would be "Too good to be true".
We now have our "anchor image". Do NOT move/rotate this
image any more unless you know what you're doing! (even the optimizer MUST
NOT touch the position of this image any more!)
| To understand the positioning of the control points, I use the
comparison of a "lever force": both defined vertical will try to "pull"
your image to a position where they are as perpendicular as possible. |
Optimizing the rest of the control points
We will now optimize the rest of the images as well as the
"Lens Parameters"
To achieve a mathematical correct optimization, you will need at
least one pair of control points for every image pair of your panorama.
Also you should not optimize "FOV", "a", "b" and "c" separately.
We have 7 checkmarks (Yaw, Pitch, Roll, FOV, a, b, c), so we need at
least 7 control points per image pair. |
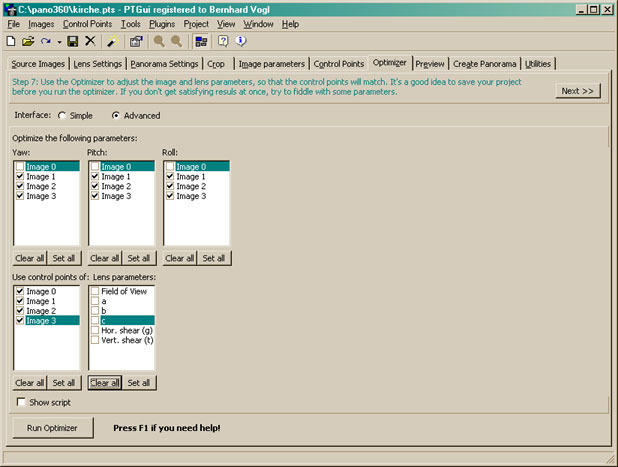
Now you have to kind of "invert" your checkmarks.
Don't forget: don't move image 0 any more, but you must adapt the rest of
the images now.
We will do the optimization step by step. So we won't touch
the lens parameters now (with a good reason).
The optimizer will finish very fast, but the result will be
"very bad" and it will definitely look very bad:
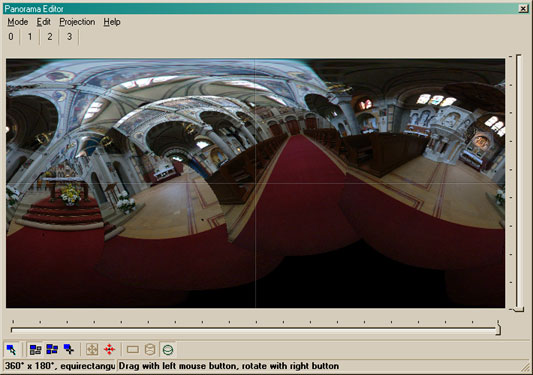
What happened?
Autopano calculates control points at identifiable
structures. In our case we have a lot of architectural elements which
look very similar. We have to remove the control points on similar - but
not same - structures.
They can be found very easily: Go back to "Control Points". Look at
images that do not overlap (e.g. image 0 and 2). Delete the control
points there.
To see all other control points that are questionable, there is a useful
little feature of PTGui: In the "Control Points" tab you will find a
button "Table" in the lower area of the window. This will list all
points in your panorama and the current distance:
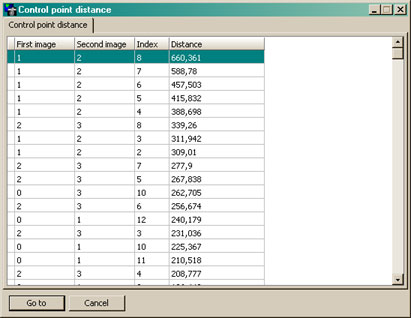
Double-click on the respective line to see the control points in your
image. There you can decide if the control point is set correctly or
not. Repeat these steps until you think you have found most of the wrong
control points.
Now you can restart the optimizer and recheck the above
table. You may repeat the steps until you are content with the
optimization.
If you get strange results from the optimizer at a later
step - come back here and recheck your control points. Most problems are
the result of a wrong control point!
We will now add some points manually in important areas of
the image and critical details. Also we will add 1 or 2 control points at
the top and bottom of the images. This area is normally somewhat neglected by
Autopano...
Finally you can add the checkmarks for the lens parameters "FOV, a, b and
c" and optimize again:
Check the result in the "Editor Window" and add some points where the
images won't fit nicely.
| If you took your photos without obeying the nodal point rule, I
strongly
discourage setting control points in areas with near and far objects.
Because of the parallax a good solution will be impossible! A good
strategy is setting
control points only at objects that are at the same distance from the
camera. |
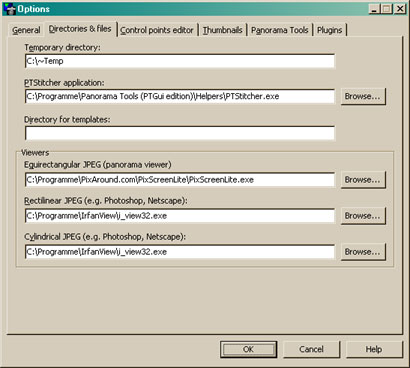
Now we can try our first preview of the panorama. In my case i prefer "PixScreen
Lite" as equirectangular viewer. This is something you can determine in the
options of PTGui:
A minimum size for the preview of 1200x600 is recommended. The new "fast
transform" option of pano12 and a fast computer will also allow fast
previews up to 3000x1500.
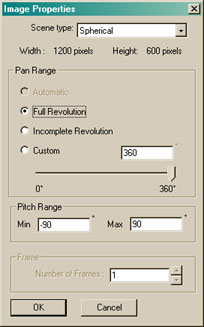
After some calculation time the "Image Properties"-window of
PixScreen will appear. Choose the "Scene Type" Spherical and activate
the box "Full Revolution"
You can now judge the final quality of your panorama for the first time. If
you are not content, go back to PTGui and try to add/change/delete some
control points for a better result.
Don't be too anxious about small image errors. We have one tool
remaining: Enblend.
The only important features in the image are straight lines which at
least have to cross themselves when spanning over more than one image.
| The correct optimization lays the ground for a good panorama.
Take some time for this step as it will help you saving a huge
amount of time when assembling the images. |
|
 |
Next step: Part 4 - The zenith-image |